

Your vehicle overheats due to a lack of coolant circulation, which is one big reason for engine failure. But, overheating is not the only sign that indicates a needed coolant flush.
This article will equip you with 5 signs you need a coolant flush and how to flush the radiator properly. Read on to learn more in this article of shine armor blog!
Related car detailing products:
- Graphene Ceramic Spray
- Fortify Quick Coat
- Revive Car Scratch Remover
- Graphene Ceramic Nano Glass Coating
- Anti-Fog Hero
- Car Upholstery and Interior Cleaner
What Is a Coolant Flush?
Once you start your car and begin driving, the engine starts heating up. Therefore, to maintain your vehicle’s temperature, the flow of antifreeze or coolant is needed.
The coolant flush helps cleanse out all of your car’s old coolant and any debris that may have accumulated over time.
A coolant flush is also an essential part of your car maintenance that prevents heat build-up. To fully clean your system, it’s vital to fully evacuate the old coolant so that the new antifreeze doesn’t blend in.
Therefore, coolant flush keeps your radiator in optimal working condition and minimizes overheating and high-temperature gauge risk. However, some people sometimes wonder whether they could put water in the radiator instead of coolant. We advise you not to do so.
Read this article: What is a Good Substitute for Car Wash Soap?
Signs You Need a Coolant Flush
Novice car keepers usually neglect radiator flush until the problem escalates. That’s why radiator problems are the most common causes of car breakdowns.
Therefore, always look out for the following signs to determine whether you need a coolant flush.
Engine Overheating and High-Temperature Gauge
One of the most common signs of low coolant is engine overheating. If your high-temperature gauge reads hotter than normal, this sign indicates that your vehicle might need a coolant flush.
Your vehicle’s cooling system wholly depends on the antifreeze to remove excess heat from the engine. A coolant or antifreeze keeps your car engine cool and running smoothly.
Therefore, if you are low on coolant, heat will build up, resulting in engine overheating and high-temperature gauge.
It is advised to check your coolant level routinely. While checking the antifreeze levels, make sure the car is in a resting state.
To do so:
- Find the overflow tank to the right of your radiator.
- If you can see inside the white plastic, you have enough coolant to rely on.
- If you cannot look through the inside, chances are you’re low on coolant.
Grinding or Knocking Engine Noise
Many motorists complain about the gurgling noise of the engine.
And if you’re one of them, you might need to read this.
99% of the time, the grinding, gurgling, or knocking engine noise comes due to the coolant flowing back into the heater.
And so, these unusual grinding sounds coming from the coolant reservoir or through hoses.
However, sometimes, upon proper inspection, the coolant appears to be plenty. Then there could be a possibility that your thermostat is not doing its job correctly.
Read this article: Why is My Car Making a Whining Noise?
Sweet Smell from the Car Hood
If your car emits a rather weird and funny smell like maple syrup or a multipurpose cleaner, fret not.
The sweet smell from the car hood signifies a coolant leak.
You can also confirm this sign if your car overheats rapidly.
Coolant Leaking Underneath Your Car
Over the course of time, you will notice your car is leaking fluids, and each fluid has a different story to tell.
For example, black fluid spots signify engine oil while oily, red fluid represents transmission oil.
However, a coolant or antifreeze leak is usually green in color, but the color ranges from orange to pink and yellow.
You can do a quick test to identify a coolant leak by following the small black hose running from your radiator. There you’ll find an antifreeze recovery tank.
If the tank is empty, you certainly have a coolant leak.
Low Coolant Level
Antifreeze not only keeps your engine cool but also provides lubricant for the water pump. Therefore, we recommend checking the coolant levels frequently.
Also, make sure your engine is cold before checking the coolant level.
Here’s how you can check your car’s antifreeze level.
- Find your coolant tank
- Compare the fluid level against the marks on the edge of the tank
If the level is too low, it’s a sign you need a coolant flush.
How to Flush the Radiator
Flushing the radiator is not rocket science. Instead, it’s one of the easiest DIY projects you can undertake.
Here’s a step-by-step guide to flushing the radiator. But first, let us list down some useful tools.
- Jack stands
- Container to catch the dripping coolant
- Rubber gloves
- Safety glasses
Step 1: Jack Up Your Car

Safety above everything.
There’s another advantage of jacking up the car in the radiator flushing process, i.e., to fit a drainage container underneath.
Since the coolant is harmful to the environment, you cannot let it drop down the streets.
Hence, any large container should be used to collect the coolant.
- Using jack stands, lift up the front of your car
- Slide a container or pan underneath the radiator
Never forget to put on the parking brake to avoid mishaps.
Read this article: How Much Oil Does My Car Need?
Step 2: Drain the Old Coolant

It’s crucial to drain the old coolant so the new one doesn’t mix in.
For proper drainage of the old antifreeze, locate your radiator’s drain plug. Normally, there will be a wing nug near the radiator’s bottom.
Place the container underneath the container and open the nut valve to start draining the old coolant completely.
Once you’re sure all the coolant has been flushed, disconnect your lower radiator hose from the radiator, allowing the rest of the antifreeze to leave the system.
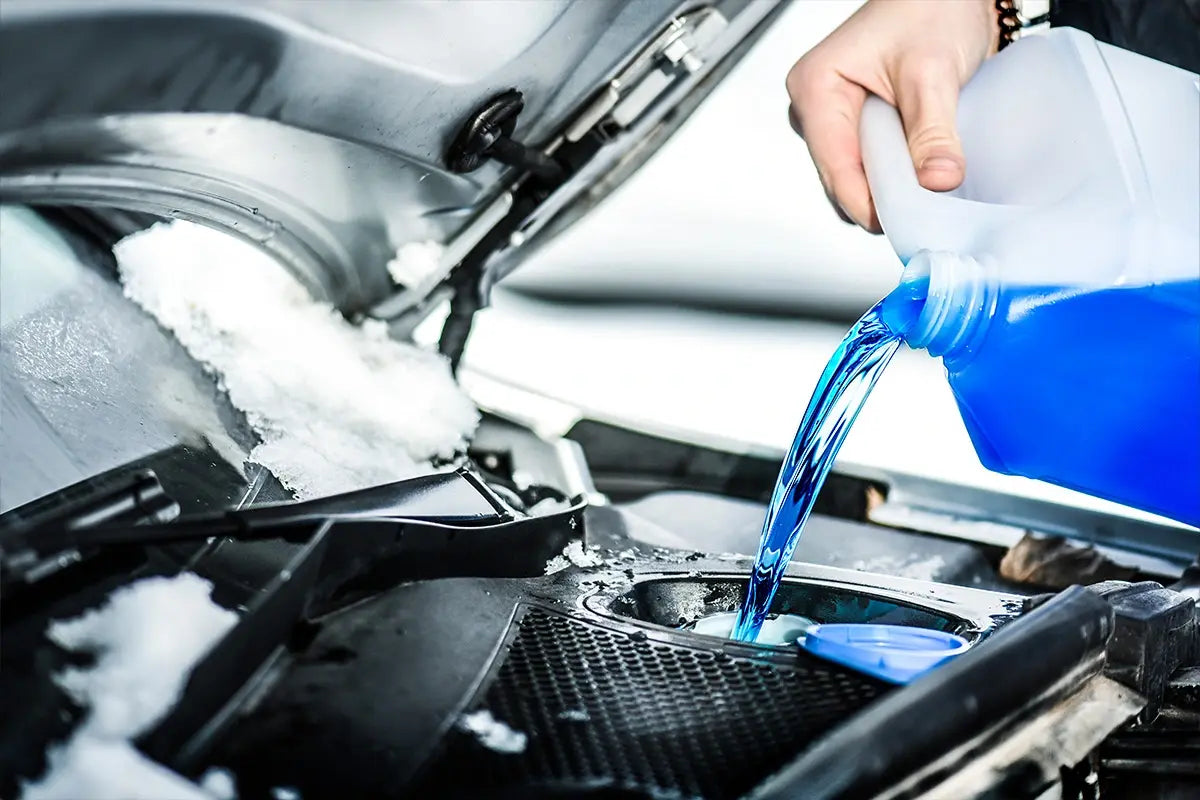
Step 3: Pour the flush cleaner and distilled water into the radiator

Replace the drain plug and remove the radiator cap before pouring the flush cleaner into the radiator.
Pour flush cleaner and distilled water into the radiator using a funnel.
The flush cleaner and distilled water ratio should be one full bottle of cleaner: distilled water 1 gallon.
Close the radiator cap and make sure it’s tight and in good condition. Then, you start your engine and let it run for at least 5 minutes. This will help to remove the contaminants in the cooling system.
It is recommended to consult your vehicle’s user manual to know the recommended cleaner and amount.
Step 4: Drain the Cleaner and Empty the Radiator
The last flushing step is to drain and empty the radiator. This step is similar to step 1.
Read this article: How to Know if Your Car is Leaking Coolant and What to Do About It
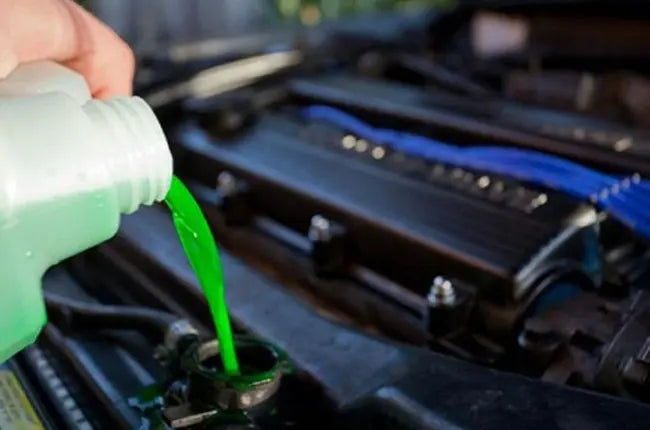
Step 5: Add New Coolant

Since our radiator is properly flushed, we are almost done!
- Replace your drain plug
- Fill the radiator with new coolant. But make sure to fill with the recommended amount of coolant fluid.
- Once filled, tighten the radiator caps, and you’re good to go.
It’s recommended to check your manufacturer’s manual to know the right coolant and how much your vehicle needs.
Final Thoughts
Flushing out your vehicle’s radiator is a five-finger task if you are equipped with the right tools and guidance. Just follow the step-by-step guide above to flush the radiator correctly.
However, if you’re new to car maintenance, we advise taking help from your mechanic for immediate flushing and learning the process smoothly.
Read this article: Touchless car wash good or bad: Effects of touchless car washes